
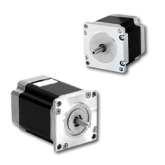
What is a Stepper Motor?
What Is A Stepper Motor: Introduction
Stepping motors can be viewed as electric motors without commutators. Typically, all windings in the motor are part of the stator, and the rotor is either a permanent magnet or, in the case of variable reluctance motors, a toothed block of some magnetically soft material. All of the commutation must be handled externally by the motor controller, and typically, the motors and controllers are designed so that the motor may be held in any fixed position as well as being rotated one way or the other. Most steppers, as they are also known, can be stepped at audio frequencies, allowing them to spin quite quickly, and with an appropriate controller, they may be started and stopped "on a dime" at controlled orientations.
For some applications, there is a choice between using servomotors and stepping motors. Both types of motors offer similar opportunities for precise positioning, but they differ in a number of ways. Servomotors require encoder feedback control systems of some type. Typically, this involves an optical or magnetic encoder to provide feedback about the rotor position, and some mix of circuitry to drive a current through the motor inversely proportional to the difference between the desired position and the current position.
In making a choice between steppers and servos, a number of issues must be considered; which of these will matter depends on the application. For example, the repeatability of positioning done with a stepping motor depends on the geometry of the motor rotor, while the repeatability of positioning done with a servomotor generally depends on the stability of the encoder and other components in the feedback circuit.
Stepping motors can be used in simple open-loop control systems; these are generally adequate for systems that operate at low accelerations with static loads, but closed loop control may be essential for high accelerations, particularly if they involve variable loads. If a stepper in an open-loop control system is overtorqued, all knowledge of rotor position is lost and the system must be reinitialized; servomotors are not subject to this problem.
Stepping motors can also be used in closed loop systems, much like servos, with the addition of an encoder and feedback drive circuitry. Performance is improved at the expense of additional cost.
Stepper Motors: Different Types
Stepping motors come in two varieties, permanent magnet and variable reluctance (there are also hybrid motors, which are indistinguishable from permanent magnet motors from the controller's point of view). Lacking a label on the motor, you can generally tell the two apart by feel when no power is applied. Permanent magnet motors tend to "cog" as you twist the rotor with your fingers, while variable reluctance motors almost spin freely (although they may cog slightly because of residual magnetization in the rotor). You can also distinguish between the two varieties with an ohmmeter. Variable reluctance motors usually have three (sometimes four) windings, with a common return, while permanent magnet motors usually have two independent windings, with or without center taps. Center-tapped windings are used in unipolar permanent magnet motors.
Stepping motors come in a wide range of angular resolution. The coarsest motors typically turn 90 degrees per step, while high-resolution permanent magnet motors are commonly able to handle 1.8 or even 0.72 degrees per step. With an appropriate controller, most permanent magnet and hybrid motors can be run in half-steps, and some controllers can handle smaller fractional steps or microsteps.
For both permanent magnet and variable reluctance stepping motors, if just one winding of the motor is energized, the rotor (under no load) will snap to a fixed angle and then hold that angle until the torque exceeds the holding torque of the motor, at which point, the rotor will turn, trying to hold at each successive equilibrium point.
Stepper Motors: Variable Reluctance Motors
If your motor has three windings, typically connected as shown in the schematic diagram in Figure 1.1, with one terminal common to all windings, it is most likely a variable reluctance stepping motor. In use, the common wire typically goes to the positive supply and the windings are energized in sequence.
The cross section shown in Figure 1.1 is of 30 degree per step variable reluctance motor. The rotor in this motor has 4 teeth and the stator has 6 poles, with each winding wrapped around two opposite poles. With winding number 1 energized, the rotor teeth marked X are attracted to this winding's poles. If the current through winding 1 is turned off and winding 2 is turned on, the rotor will rotate 30 degrees clockwise so that the poles marked Y line up with the poles marked 2.
Animated Figure 1.1:
In looking at the animated figure, note the following:
1. The field appears to rotate counterclockwise while the rotor rotates clockwise. This arrangement is common with variable reluctance motors.
2. The field rotates in steps of 60 degrees while the rotor moves in 30 degree steps (in the opposite direction). This is reminicent of the motion of the scale of a vernier caliper, and for this reason, variable reluctance motors are sometimes known as vernier motors.
3. It takes four complete cycles of the control system to rotate the motor rotor through one cycle. This is because the rotor has 4 poles!
-----
To rotate this motor continuously, we just apply power to the 3 windings in sequence. Assuming positive logic, where a 1 means turning on the current through a motor winding, the following control sequence will spin the motor illustrated in Figure 1.1 clockwise 24 steps or 2 revolutions:
Winding 1 1001001001001001001001001
Winding 2 0100100100100100100100100
Winding 3 0010010010010010010010010
time --->
There are also variable reluctance stepping motors with 4 and 5 windings, requiring 5 or 6 wires. The principle for driving these motors is the same as that for the three winding variety, but it becomes important to work out the correct order to energize the windings to make the motor step properly.
The motor geometry illustrated in Figure 1.1, giving 30 degrees per step, uses the fewest number of rotor teeth and stator poles to perform satisfactorily. Using more motor poles and more rotor teeth allows construction of motors with smaller step angle. Toothed faces on each pole and a correspondingly finely toothed rotor allows for step angles as small as a few degrees.
Stepper Motors: Unipolar Motors
Unipolar stepping motors, both Permanent magnet and hybrid stepping motors with 5 or 6 wires are usually wired as shown in the schematic in Figure 1.2, with a center tap on each of two windings. In use, the center taps of the windings are typically wired to the positive supply, and the two ends of each winding are alternately grounded to reverse the direction of the field provided by that winding.
Animated Figure 1.2:
In looking at this figure, note the following:
1. This 6-pole rotor turns in a direction opposite the rotation of the stator field; a two-pole rotor inside the exact same stator would rotate with the field.
2. This illustration is based on half-step control, where alternate half steps involve one and two motor windings.
3. It takes three complete cycles of the control system to turn this 6-pole rotor one revolution. A two-pole rotor would turn a full revolution per control system cycle.
-----
The motor cross section shown in Figure 1.2 is of a 30 degree per step permanent magnet or hybrid motor -- the difference between these two motor types is not relevant at this level of abstraction. Motor winding number 1 is distributed between the top and bottom stator pole, while motor winding number 2 is distributed between the left and right motor poles. The rotor is a permanent magnet with 6 poles, 3 south and 3 north, arranged around its circumference.
For higher angular resolutions, the rotor must have proportionally more poles. The 30 degree per step motor in the figure is one of the most common permanent magnet motor designs, although 15 and 7.5 degree per step motors are widely available. Permanent magnet motors with resolutions as good as 1.8 degrees per step are made, and hybrid motors are routinely built with 3.6 and 1.8 degrees per step, with resolutions as fine as 0.72 degrees per step available.
As shown in the figure, the current flowing from the center tap of winding 1 to terminal a causes the top stator pole to be a north pole while the bottom stator pole is a south pole. This attracts the rotor into the position shown. If the power to winding 1 is removed and winding 2 is energized, the rotor will turn 30 degrees, or one step.
To rotate the motor continuously, we just apply power to the two windings in sequence. Assuming positive logic, where a 1 means turning on the current through a motor winding, the following two control sequences will spin the motor illustrated in Figure 1.2 clockwise 24 steps or 4 revolutions:
Winding 1a 1000100010001000100010001
Winding 1b 0010001000100010001000100
Winding 2a 0100010001000100010001000
Winding 2b 0001000100010001000100010
time --->
Winding 1a 1100110011001100110011001
Winding 1b 0011001100110011001100110
Winding 2a 0110011001100110011001100
Winding 2b 1001100110011001100110011
time --->
Note that the two halves of each winding are never energized at the same time. Both sequences shown above will rotate a permanent magnet one step at a time. The top sequence only powers one winding at a time, as illustrated in the figure above; thus, it uses less power. The bottom sequence involves powering two windings at a time and generally produces a torque about 1.4 times greater than the top sequence while using twice as much power.
The step positions produced by the two sequences above are not the same; as a result, combining the two sequences allows half stepping, with the motor stopping alternately at the positions indicated by one or the other sequence. The combined sequence is as follows:
Winding 1a 11000001110000011100000111
Winding 1b 00011100000111000001110000
Winding 2a 01110000011100000111000001
Winding 2b 00000111000001110000011100
time --->
Stepper Motors: Bipolar Motors
Bipolar permanent magnet and hybrid motors are constructed with exactly the same mechanism as is used on unipolar motors, but the two windings are wired more simply, with no center taps. Thus, the motor itself is simpler but the drive circuitry needed to reverse the polarity of each pair of motor poles is more complex. The schematic in Figure 1.3 shows how such a motor is wired, while the motor cross section shown here is exactly the same as the cross section shown in Figure 1.2.
The drive circuitry for such a motor requires an H-bridge control circuit for each winding. Briefly, an H-bridge allows the polarity of the power applied to each end of each winding to be controlled independently. The control sequences for single stepping such a motor are shown below. The + and - symbols are used to indicate the polarity of the power applied to each motor terminal:
Terminal 1a +---+---+---+--- ++--++--++--++--
Terminal 1b --+---+---+---+- --++--++--++--++
Terminal 2a -+---+---+---+-- -++--++--++--++-
Terminal 2b ---+---+---+---+ +--++--++--++--+
time --->
Note that these sequences are identical to those for a unipolar permanent magnet motor, at an abstract level, and that above the level of the H-bridge power switching electronics, the control systems for the two types of motor can be identical.
Note that many full H-bridge driver chips have one control input to enable the output and another to control the direction. Given two such bridge chips, one per winding, the following control sequences will spin the motor identically to the control sequences given above:
Enable 1 1010101010101010 1111111111111111
Direction 1 1x0x1x0x1x0x1x0x 1100110011001100
Enable 2 0101010101010101 1111111111111111
Direction 2 x1x0x1x0x1x0x1x0 0110011001100110
time --->
To distinguish a bipolar permanent magnet motor from other 4 wire motors, measure the resistances between the different terminals. It is worth noting that some permanent magnet stepping motors have 4 independent windings, organized as two sets of two. Within each set, if the two windings are wired in series, the result can be used as a high voltage bipolar motor. If they are wired in parallel, the result can be used as a low voltage bipolar motor. If they are wired in series with a center tap, the result can be used as a low voltage unipolar motor.
Stepper Motors: Biflar Motors
Bifilar windings on a stepping motor are applied to the same rotor and stator geometry as a bipolar motor, but instead of winding each coil in the stator with a single wire, two wires are wound in parallel with each other. As a result, the motor has 8 wires, not four.
In practice, motors with bifilar windings are always powered as either unipolar or bipolar motors. Figure 1.4 shows the alternative connections to the windings of such a motor.
To use a bifilar motor as a unipolar motor, the two wires of each winding are connected in series and the point of connection is used as a center-tap. Winding 1 in Figure 1.4 is shown connected this way.
To use a bifilar motor as a bipolar motor, the two wires of each winding are connected either in parallel or in series. Winding 2 in Figure 1.4 is shown with a parallel connection; this allows low voltage high-current operation. Winding 1 in Figure 1.4 is shown with a series connection; if the center tap is ignored, this allows operation at twice the voltage and half the current as would be used with the windings in parallel.
It should be noted that essentially all 6-wire motors sold for bipolar use are actually wound using bifilar windings, so that the external connection that serves as a center tap is actually connected as shown for winding 1 in Figure 1.4. Naturally, therefore, any unipolar motor may be used as a bipolar motor at twice the rated voltage and half the rated current as is given on the nameplate.
For those who salvage old motors, finding an 8-wire motor poses a challenge! Which of the 8 wires is which? It is not hard to figure this out using an ohm meter, an AC volt meter, and a low voltage AC source. First, use the ohm meter to identify the motor leads that are connected to each other through the motor windings. Then, connect a low-voltage AC source to one of these windings. The AC voltage should be below the advertised operating voltage of the motor; voltages under 1 volt are recommended. The geometry of the magnetic circuits of the motor guarantees that the two wires of a bifilar winding will be strongly coupled for AC signals, while there should be almost no coupling to the other two wires. Therefore, probing with an AC volt meter should disclose which of the other three windings is paired to the winding under power.
Stepper Motors: Multiphase Motors
A less common class of permanent magnet stepping motor is wired with all windings of the motor in a cyclic series, with one tap between each pair of windings in the cycle. The most common designs in this category use 3-phase and 5-phase wiring. The control requires 1/2 of an H-bridge for each motor terminal, but these motors can provide more torque from a given package size because all or all but one of the motor windings are energized at every point in the drive cycle. Some 5-phase motors have high resolutions on the order of 0.72 degrees per step (500 steps per revolution).
With a 5-phase motor, there are 10 steps per repeat in the stepping cycle, as shown below:
Terminal 1 +++-----+++++-----++
Terminal 2 --+++++-----+++++---
Terminal 3 +-----+++++-----++++
Terminal 4 +++++-----+++++-----
Terminal 5 ----+++++-----+++++-
time --->
Here, as in the bipolar case, each terminal is shown as being either connected to the positive or negative bus of the motor power system. Note that, at each step, only one terminal changes polarity. This change removes the power from one winding attached to that terminal (because both terminals of the winding in question are of the same polarity) and applies power to one winding that was previously idle. Given the motor geometry suggested by Figure 1.5, this control sequence will drive the motor through two revolutions.
To distinguish a 5-phase motor from other motors with 5 leads, note that, if the resistance between two consecutive terminals of the 5-phase motor is R, the resistance between non-consecutive terminals will be 1.5R.
Note that some 5-phase motors have 5 separate motor windings, with a total of 10 leads. These can be connected in the star configuration shown above, using 5 half-bridge driver circuits, or each winding can be driven by its own full-bridge. While the theoretical component count of half-bridge drivers is lower, the availability of integrated full-bridge chips may make the latter approach preferable.
article contributed by Douglas W. Jones Copyright © 1995, Douglas W. Jones; major revision 1998.
See also, our stepper glossary of terms
The company's products are listed below for your reference:

Sponsored Webinar
Sponsored by AB Journal - Understanding PLC-Based Stepper Motion Control: Learn about how...
Watch Now